Set up a forwarding (redirection)
- Navigate to the desired SWIZZHosting cPanel
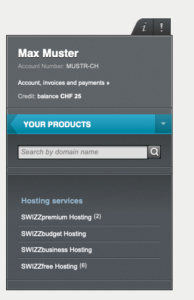
- Log in to your cPanel dashboard and select the Redirections link.

- On the next page, select the type of redirection you want to apply, enter the destination URL and click Add. Your redirect is now set up and working.


- The redirect consists of redirecting the page of domain A to the page of domain B.
- If you want to activate mirror hosting instead, you need to act in the Aliases section of cPanel.
Create an FTP account
- Navigate to the desired SWIZZHosting cPanel
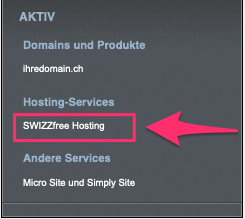
- Click on the FTP accounts icon in the cPanel under the FILES section.

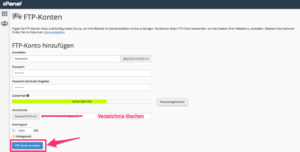
- Under FTP account , please follow the steps listed below:
- On the next page, enter your user name in the Login field.
- Enter the desired password in the Password field. The password must have a security level of at least 65 points. You can use the password generator to create a strong password.
- In the Directory field, enter the path to the folder that you want to access with the FTP user. We recommend that you enter the value“/public_html“. This allows you to access the folder of the main domain on which the hosting has been configured. Otherwise, delete the entire content in order to be able to access it from the host’s home directory.
- In the Quota field, you can specify a maximum data volume for uploading files by the respective FTP user. We recommend that you leave this entry set to Unlimited by default.
- Once you have completed this, click on Create FTP account. Your FTP account has now been created.
- After you have created the account, the following parameters must be configured in the FTP client of your choice to ensure a connection to the web hosting via FTP:
| Hostname | ftp.[domain.ext] |
| FTP user name | FTP e-mail address |
| FTP password | **** |
| Port | 21 |
- The configuration parameters can be found under Configure FTP client. Alternatively, you can enter the shared IP address of your SWIZZ hosting for the FTP server in the FTP client.

Create MySQL databases

- Before you carry out the following steps, please note that each database name and database user name may only contain letters and numbers. Special characters are not allowed.
- If you have configured a name with other characters and the database is therefore no longer visible, create a support ticket.
- Navigate to the desired SWIZZHosting cPanel

Simple procedure
- The easiest way to create a database is to use the wizard. To do this, click on MySql® Database Wizard.
Follow the steps shown to correctly create your new database and assign the user.

Manual procedure
- Under the DATABASES section, click on MySQL databases

- In the New database field, enter the name you want to use for your database. Then click on the Create database button.

- Scroll down to the Add new user section. Now enter a user name for the database and set a password. Repeat the password. The password must have a security level of at least 65.
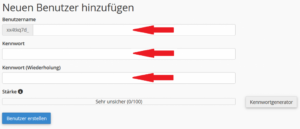
- Click on Create user
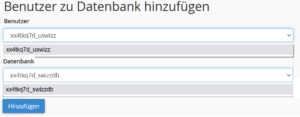
- In the Add user to database section, select the user you wish to assign and the database they are to manage. Then click on Add.
- Now select the authorizations for the respective user and then click on Make changes.
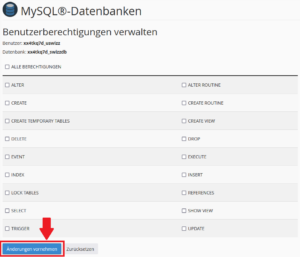
- Then click on Reset. Your database is now created.
Managing MySQL databases
There are two ways to access the database administration:
Online
- You can access your phpMyAdmin via the cPanel. Click on phpMy Admin in the DATABASES section.
You can then manage the database you have created online.

Remote administration
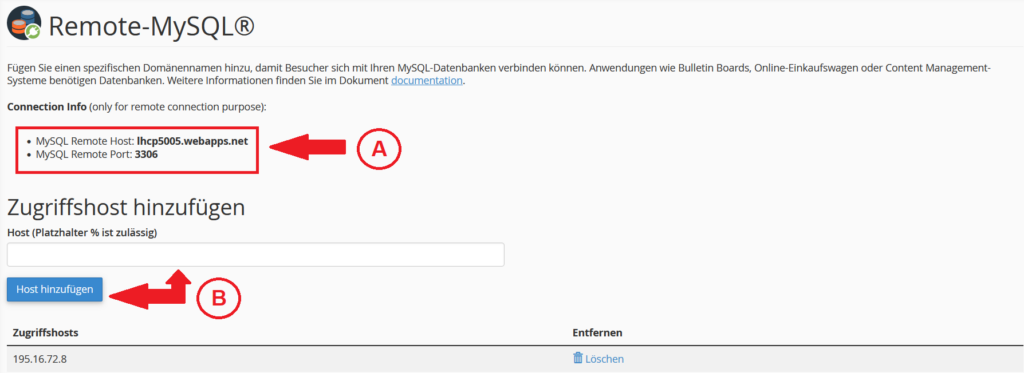
- You can also access and manage your database remotely via a client or an external application. To do this, click on Remote-MySQL®.

- On this page you will find the information you need to log in (A). You can also add hosts that can connect to your database (B).
Change PHP version
A website continuously requires adjustments to the PHP version and php.ini settings due to various developments. Updates to hosting platforms and web software require new security features. A concrete example of this would be the activation of error logging or increasing the available memory for PHP.
- Navigate to the desired SWIZZHosting cPanel

- Click on Select PHP version

- To change the PHP version, carry out the following steps in sequence:
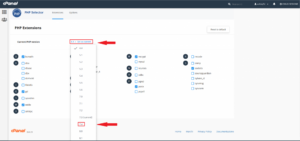
- Click on the Set as current link, at the top of the page
- Select the desired version
- Click again on the Set as current link above. The PHP version has now been changed.

Updating your PHP version also updates the supported server functions. Therefore, check the compatibility of the web software you are using (such as WordPress, Joomla etc.) with the selected PHP version. New PHP versions can mean that your web software no longer functions optimally.
Change PHP.ini
- Open the desired SWIZZHosting cPanel via the Control Panel.

- In the cPanel, navigate to the SOFTWARE section and open Select PHP Version.

- To change the directives (behavior rule) of the server, click on Options

- Edit the desired directive by selecting values from the menu or entering values in the corresponding fields. The changes are applied within a few seconds.
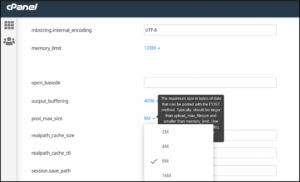
Addingdirectives manually
To be able to set the various directives without using the panel GUI, you can add the desired value directly to the .htaccess file of your website with the following directive:
- php_value “value”
- php_flag “value“
In this way, you can activate all desired customizations with the exception of the system configurations.
Exceeding hosting limits
If you experience slowdowns or errors (Error 500, 503, 508) when using your current SWIZZ hosting plan or if all website components are not displayed correctly, the LVE limits of your hosting plan may have been reached or exceeded.
The LVE (Lightweight Virtual Environment) technology enables you to monitor the use of website resources, among other things.
The respective maximum limits for the individual hosting packages can be seen in the comparison table.
- Open the desired SWIZZHosting cPanel via the Control Panel.

- Click on Resource usage in the METRICS section.

- Click on Current Usage.

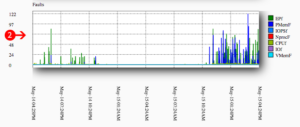
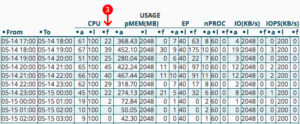
- On the Resource Usage page, you can display the resource consumption diagrams.
- The time interval selector; selection of predefined or manually modifiable time frames, which can be displayed in minutes, hours or days.

- The graph of faults (failures or errors): This visualizes the average value of exceedances for the defined time interval. A good indicator that everything is going well is when no entries are visible.
- The overview table for resource utilization: Column f (faults) shows overruns in the reference hour. The indicator for smooth functionality is the number 0. Column a shows the average value. Column l in turn shows the maximum value.
Details of the different types of overruns (faults)
Values are listed and explained below which, if exceeded, indicate that a change to a more comprehensive hosting package is recommended.
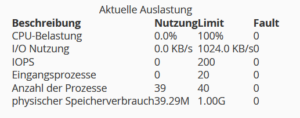
| Name | Description | Effect |
|---|---|---|
| CPU load | This value shows the proportion of CPU usage of all running processes. As soon as the value reaches 100%, the full available performance is utilized. | The performance of the website is slowed down |
| I/O utilization | This key figure shows how many bytes per second programs can read or write. | The performance of the website is slowed down |
| IOPS | This value illustrates how many operations per second are generated by the programs. | The performance of the website slows down, especially when demanding processing operations are required that involve a large number of read and write accesses to the hard disk. |
| Input processes | This term refers to the upper limit of the number of HTTP requests for each individual CGI file and PHP script. | Once the limit is reached, HTTP requests are no longer processed by the website. Instead, a 508 error page is displayed until the number of Entry Processes requests falls below the limit again. |
| Number of processes | Refers to the total number of script, application and cron processes in the hosting package. | If the limit is exceeded, cron jobs and other scripts, as well as HTTP requests for non-PHP content, are no longer processed. This results in the affected websites displaying 503 or 500 errors. |
| Physical memory consumption | Describes the amount of memory used by running processes. | The 503 or 500 error is displayed on the website. |
