Step 1 – Prepare data
- Log in to the hosting of your current provider. Download all data and databases relating to your website and save them locally.
Step 2 – Prepare WEB hosting
- Activate the desired WEB hosting.
- You can also activate the free Micro Hosting product.

Step 3 – Import data
- Create an FTP user in the WEB Hosting dashboard. You can find detailed instructions here.

- Upload your data to the www. directory via the file manager in the WEB Hosting dashboard or an FTP client of your choice.

- If you need a database, you must first create one. You can find step-by-step instructions here.

Step 4 – Set up DNS zone
- When using the Swizzonic:
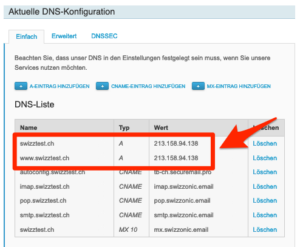
Navigate to the DNS configuration in the Control Panel:
Control Panel > domain.tld > DOMAIN AND DNS > DNS Configuration > Advanced
Add the two A-Records that you can take from the WEB Hosting dashboard.


- When using external name servers:
Enter the two A-Records, which you can find in your WEB Hosting dashboard overview, in the DNS zone of your current DNS provider.

