Activation
- Log in to your customer area.

- The WEB Hosting product to be activated can be found under ACTIVATION PENDING. Click on the product you have purchased to continue with the activation.

- In the installation mask, enter the domain without http and without www.
- If you enter an invalid or unregistered domain, the system will display an error message:
You must enter a valid domain that has not yet been activated.
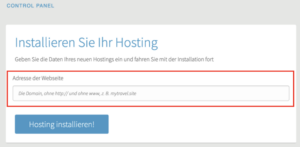
- If you enter a domain that has been registered or subscribed to with Swizzonic, you will receive a suggestion in the drop-down menu. Now click on Install hosting. Now click on Install hosting.

- The process may take some time, in the meantime a loading bar will appear. Please be patient until the system completes the installation and the following screen appears.
Click on Connect.
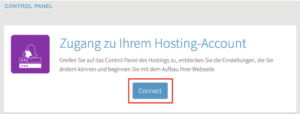
- The hosting has been installed and is ready for use. After you have clicked on Connect, you have access to the WEB Hosting dashboard.

Overview of dashboard and functions
Dashboard
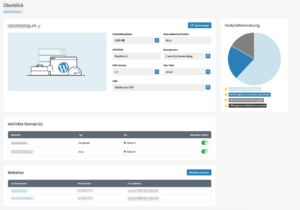
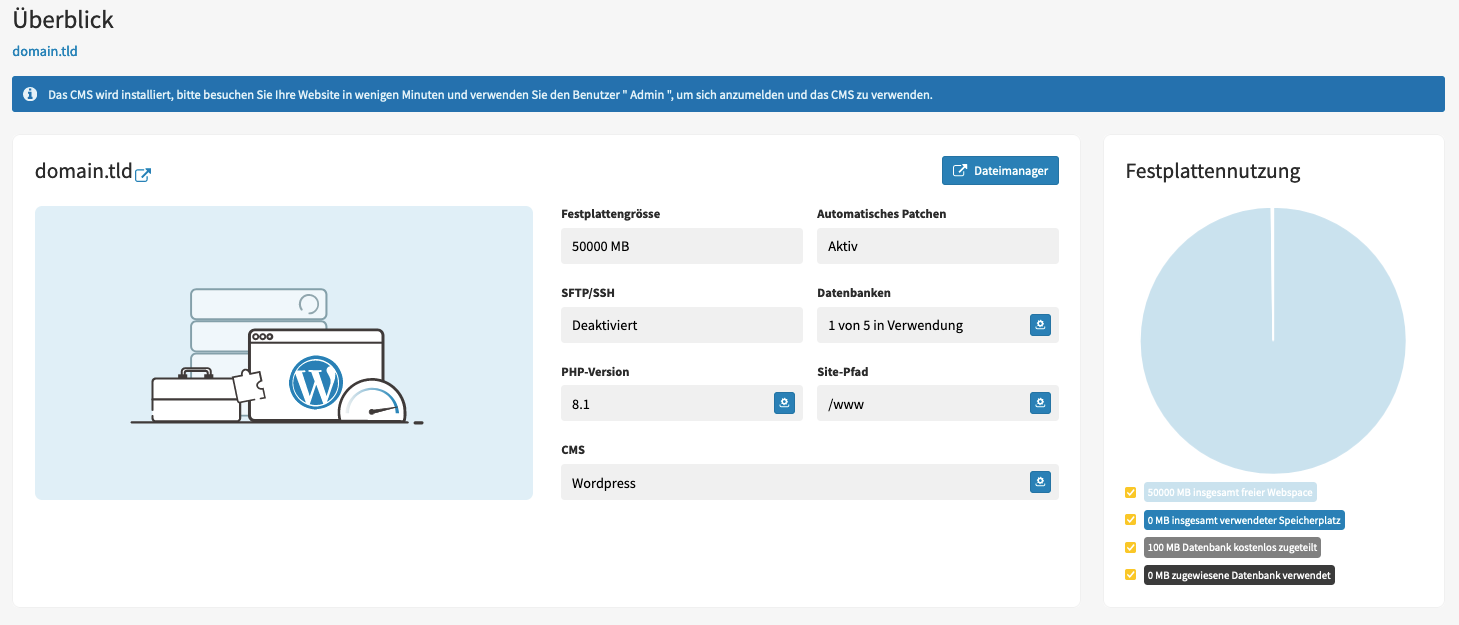
- In the dashboard, you can see the most important information about your hosting at a glance.
Hard disk usage
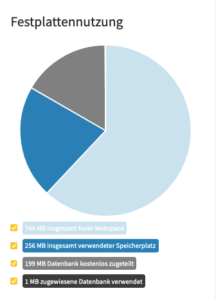
- The hard disk usage display shows you graphically how much storage space you still have available and how much of it is being used for specific applications.
First overview
- In the Hard disk size field, you can see how much storage space the subscription contains. You can carry out an upgrade by clicking on
 and then following the order process.
 - Under SFTP/SSH you can see whether this is activated or deactivated. SSH is only available from the WEB Hosting Advanced subscription variant.
- The PHP version can be changed by clicking on the icon
 . You will then be taken to the PHP settings menu
 - Under Databases you can see the number of databases that are in use. Clicking on the icon
 takes you to the Databases menu. Depending on your subscription version, you can add further databases here.
 - In the CMS field, you can see which content management system you are using in the current hosting. Click on the icon
 to navigate to the Install CMS menu
 - Under Site path, you can define the path for your website.

Pages
Under the Site menu item, you can manage the following options:
Install CMS: You can install a CMS such as WordPress, Joomla, Drupal, Shopware under this item.
Domains & SSL: Get an overview of your domains and the SSL status. Under this menu item you can add further websites, display the respective IP addresses, make detailed SSL settings, edit website paths and add domain aliases.
FTP: You can create and manage your FTP accounts under this menu item.
SSH: This option is only available from a WEB Hosting Advanced subscription plan. You can configure your SSH key under this menu item.
Databases: Depending on the subscription plan, you can create up to 100 MySQL® databases.
Back-ups: Under this menu item you can restore back-ups with a retention period of up to 28 days.
Logs and statistics: Here you can set how long you want to save logs and view your website statistics.


Web filter
You can manage the following items under the Web filter menu item:
Web filter: You can use web filters to block suspicious data traffic on your website. In this way, you can limit the misuse of your software. If in doubt, we recommend that you keep the default settings.
Secure folders: If a folder is secured, the pages hosted in this folder will ask for a password before they are opened.

Advanced
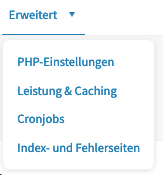
PHP settings: Under this item you can change the PHP version or make changes to the directives as well as activate or deactivate extensions.
Performance & Caching: Here you can activate GZIP compression and MultiViews. GZIP compresses the communication between our server and your visitors’ web browser, making your website load faster. The “Multiviews” option allows you to call up files without their extensions. You can also view the status of various caching systems and manage them if necessary.
Cronjobs: You can set the intervals under Cronjobs and add the desired cronjob scripts.
Index and error pages: Here you can view and edit the index and error pages.
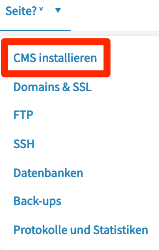
Install CMS
- Click on Install CMS in the WEB Hosting Dashboard menu.
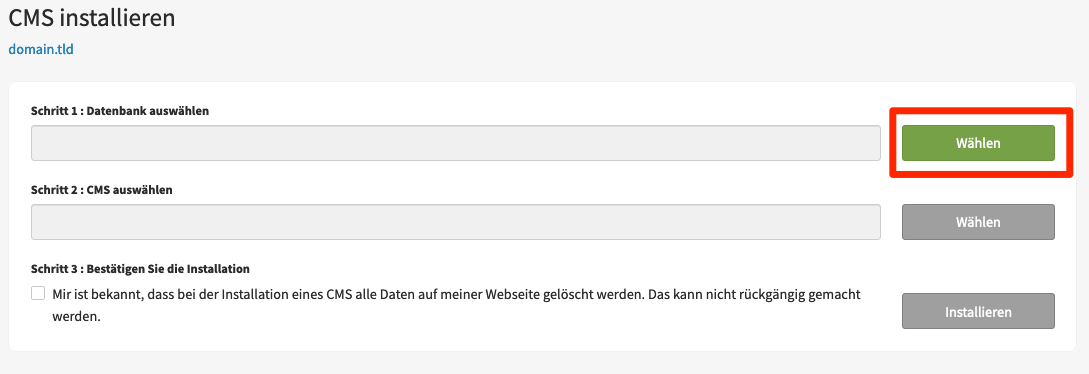
- Click Select in step 1: Select database.
- When installing a database for the first time, an information screen appears. Click on Save to continue.

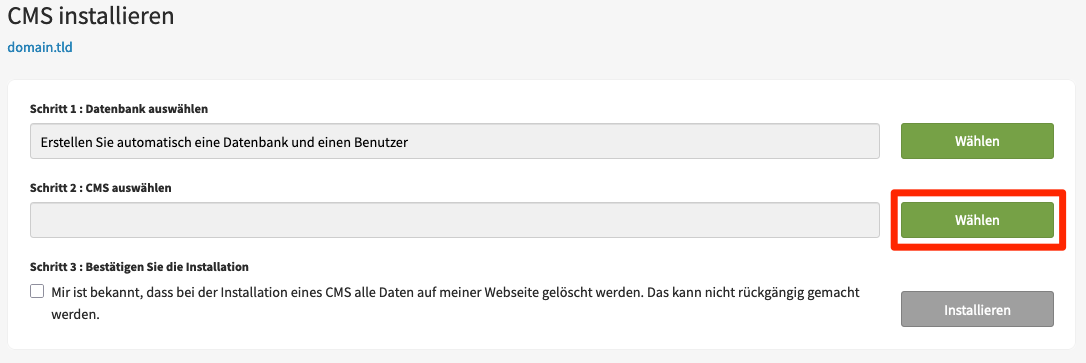
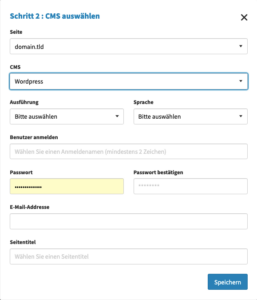
- In the next step, you must select a CMS. To do this, first click on Select. A form will then open.
- All fields in the form must be entered:
- select the page
- select one of the 4 available CMS (WordPress, Joomla, Dropal and Shopware)
- decide on a version(version)
- select a language
- Enter a user name
- Enter a password
- enter your e-mail address
- Define a page title
Then click on Save.
- Please note that when you install a CMS, all data on your website will be deleted and this step cannot be undone. Check the box and click on Install.

- The installation may now take a few minutes. You can then navigate to your website.
Create FTP account
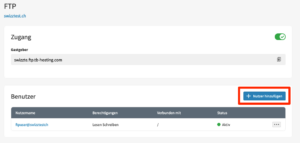
- Click on FTP in the WEB Hosting Dashboard menu.

- Under FTP, click on Add user.
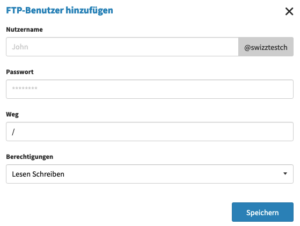
- Enter the user name and a password of your choice. Select the authorizations you want to give the FTP user and then click on Save.
Create database
- Click on the Page menu item in the WEB Hosting Dashboard and select Databases.

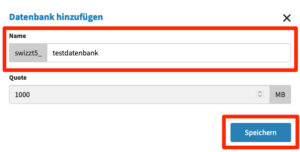
- Now click on Add database.

- Give the database a name and finish by clicking Save.
- If you have already created a database, you can call up further options by clicking on the
 icon.
icon.
- open phpMyAdmin
- Manage users
- Display back-ups
- Display and edit database
- Delete database
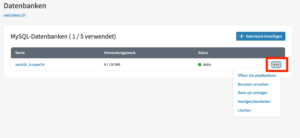
- To be able to use a database, you must first assign a user to it. To do this, click on Manage users.

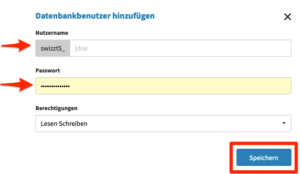
- Set up a new user. To do this, enter a user name and a new password . Then decide on the database user’s authorizations. Finally, click on Save.
REDIS Cache
The Redis plugin must be further configured to be functional.

The option is not active in the free product.
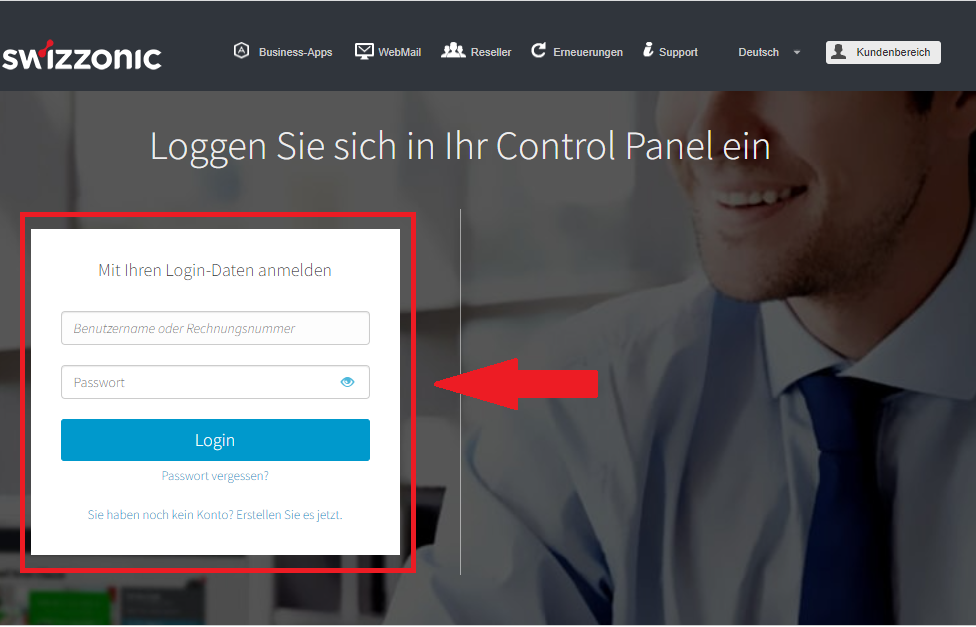
Visit your personal customer area
If you no longer know how to do this, follow these instructions.
Click on the desired WEB Hosting product to access the WEB Hosting Management Dashboard.
All your WordPress hosting products can be found in the Control Panel under the WordPress & Web Hosting menu item.
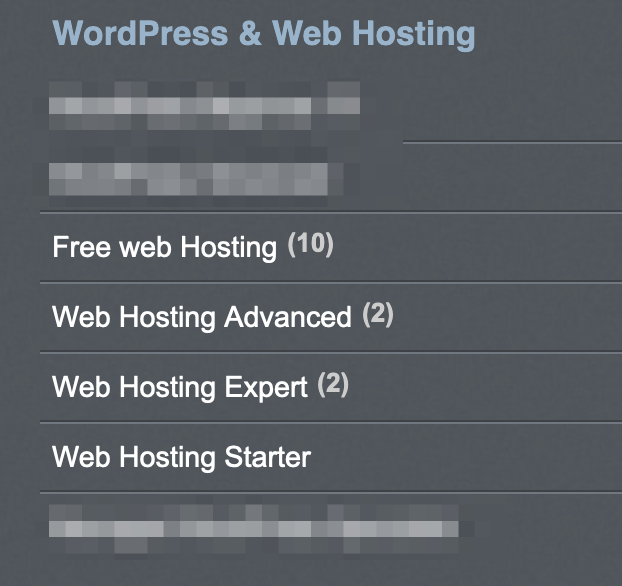
Detailed installation instructions can be found under the following links:
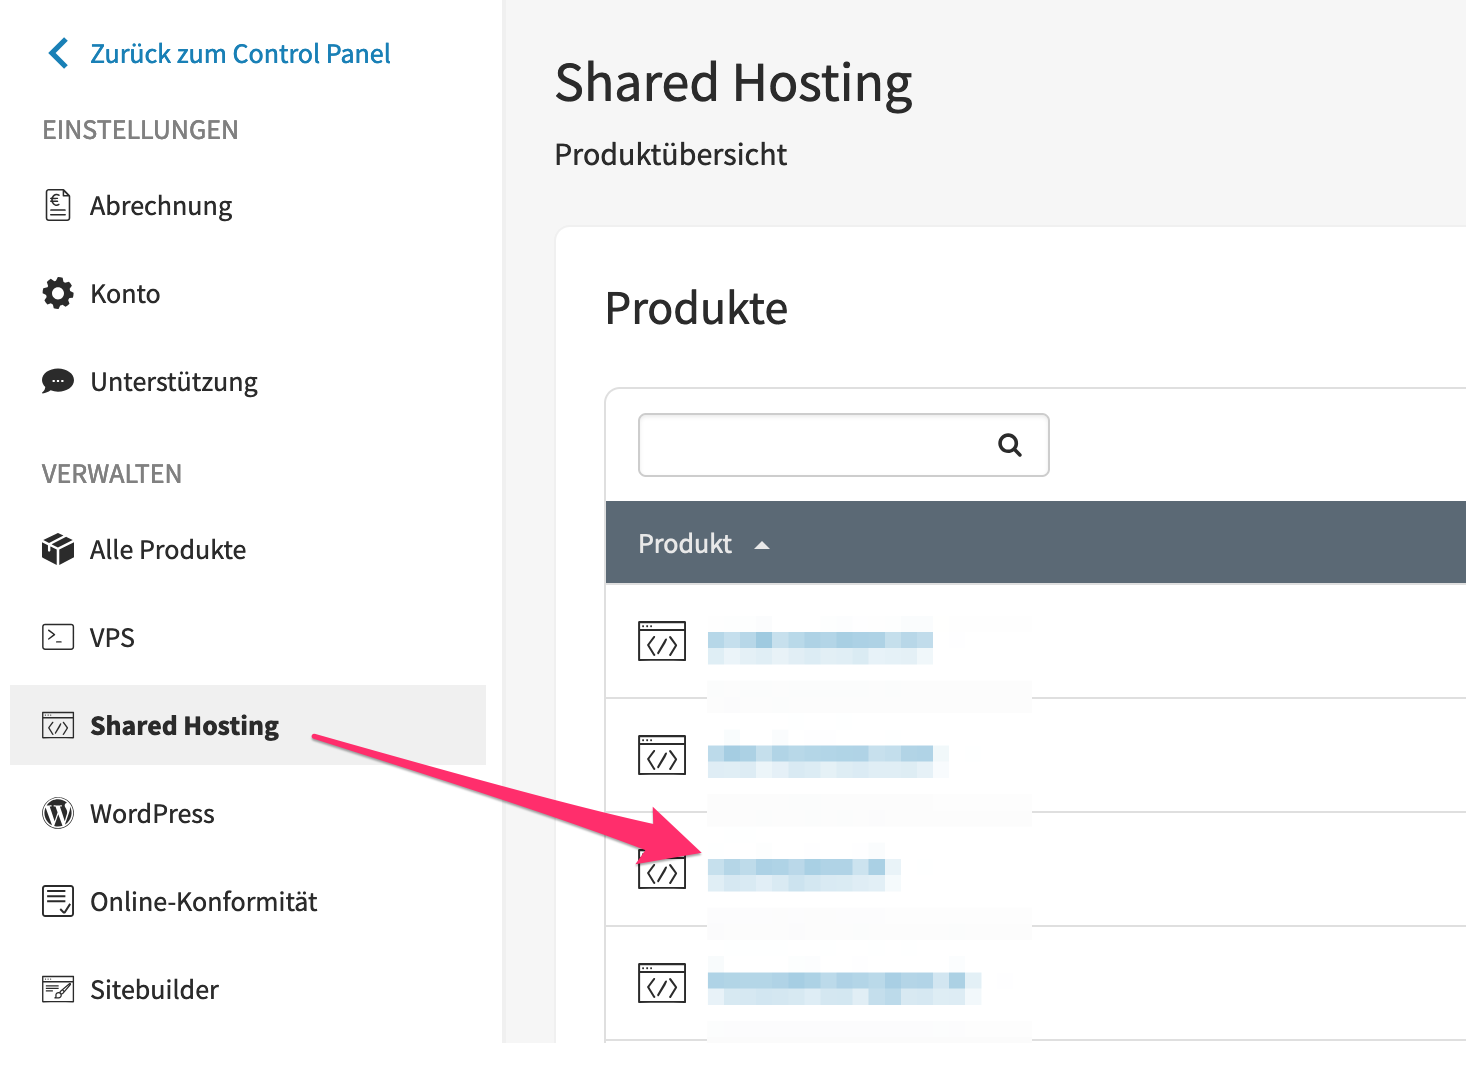
As soon as you click on one of the WordPress products, the hosting dashboard opens. There you can see the respective product that is assigned to the domain. There may be several domains in this dashboard. Click on the relevant domain under Shared Hosting.
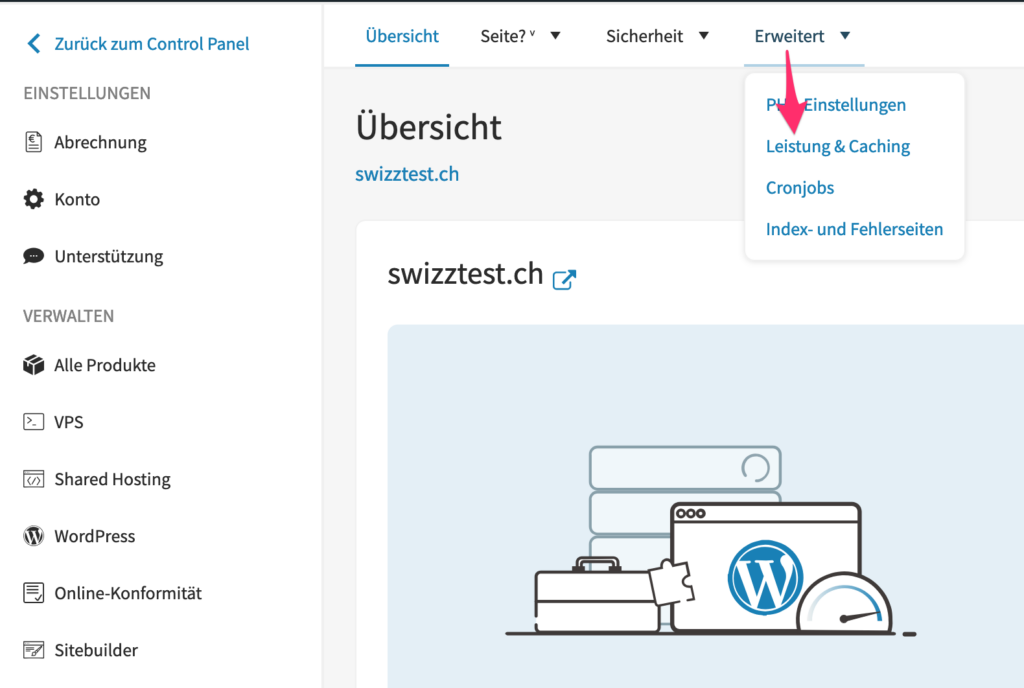
Now click on Advanced and then on Performance & Caching
When you click on Manage, you will see the server host name and the port.

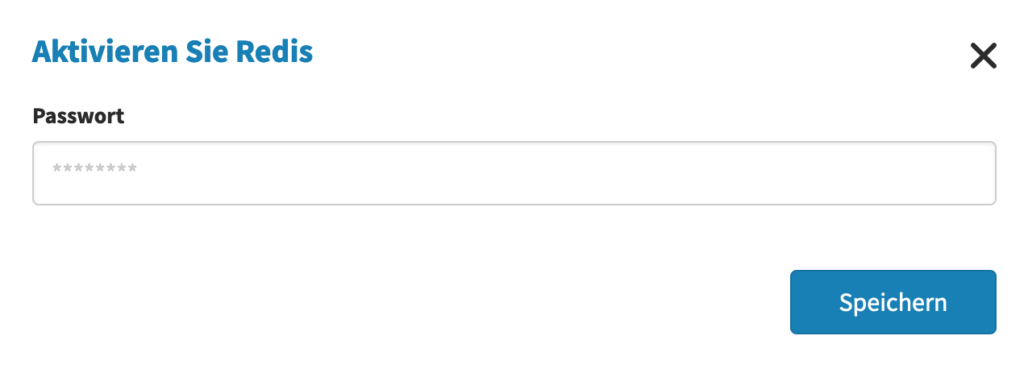
Here you can activate the Redis Cache > Activate

Set up the password and click on Save.
Then add the following three lines to your wp-config.php file and replace “set-their-pass” with your actual password:
define('WP_REDIS_HOST', 'Ihr-Hostname');

define('WP_REDIS_PORT', 'Ihr-Port');

define('WP_REDIS_PASSWORD', 'Ihr-Passwort');