Activate WordPress hosting
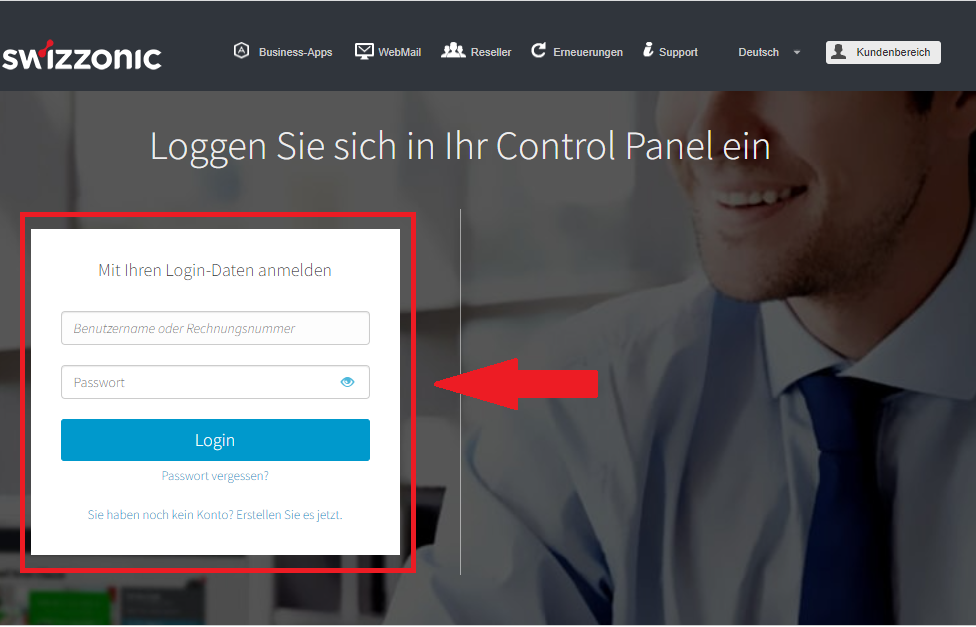
Once you have purchased a WordPress Hosting or Managed WordPress Hosting package, you will need to log in to your customer area to assign the product and see the control panel.
Visit your personal customer area.
If you do not remember how to do this, follow these instructions.
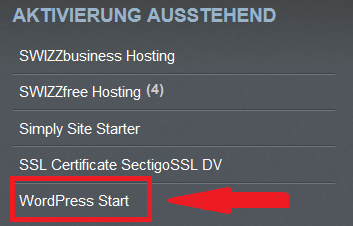
Your product is located in the right-hand menu under ACTIVATION OUTSTANDING.
Click on the product to continue with the activation.
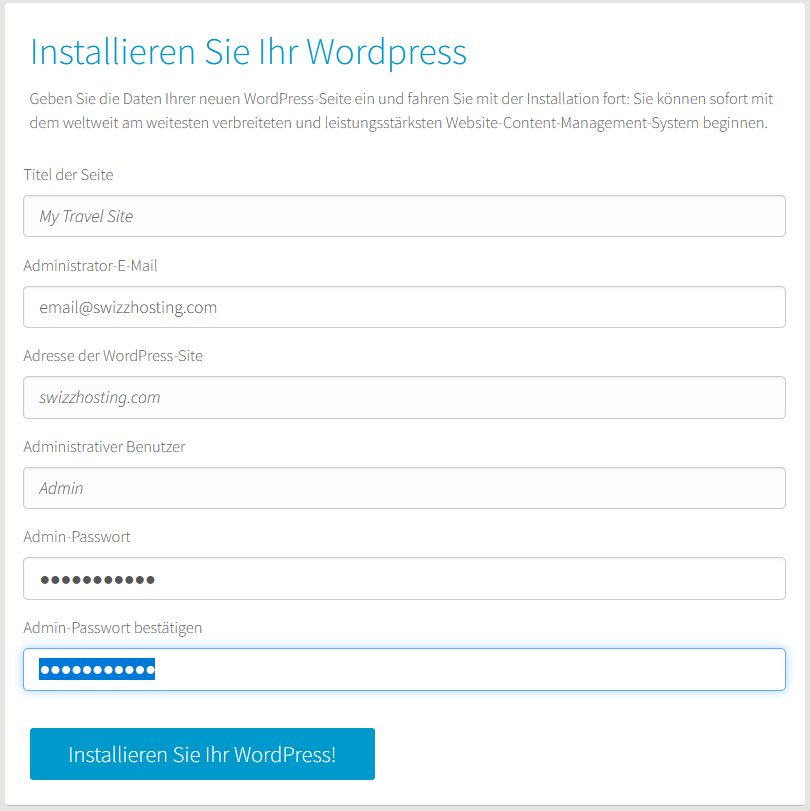
The WordPress installation form will now appear. Please fill in all fields:
- Site title:
Enter the name of the site to be displayed after go live. - Administrator email:
Please enter the email address you would like to use to administer the product. - WordPress site address:
Here you need to enter the domain you want to link the installation to. - Administrative user:
To get access to your WordPress site the name of the administrator must be added. You can also use the name Admin, for example. - Admin password:
Enter the desired password for the administrator and repeat it in the next field.
And then click on Install your WordPress!

Remember to write down all access data on a secure medium, especially the user and password.
This will allow you to access the administration of your website at any time.
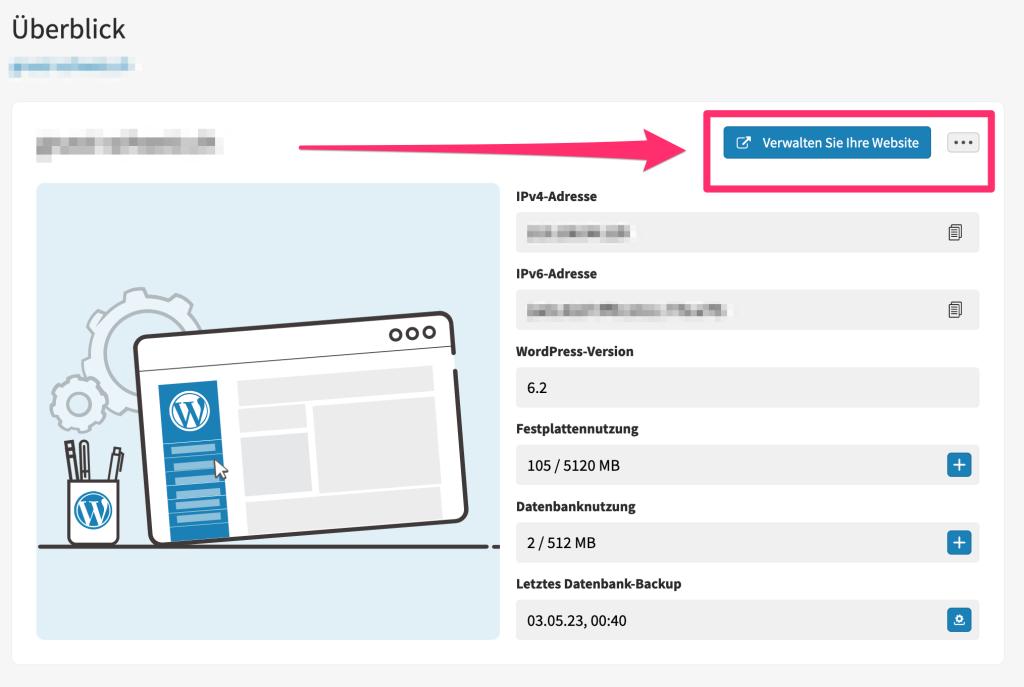
After a few moments, the installation is complete. You can now access the hosting administration panel by clicking on the Connect button.
Transfer/migration to WordPress hosting – How to validate your website
Before requesting a transfer to Managed WordPress hosting, please note the following guidelines:
- Access your current WordPress admin dashboard and go to Home –>
Updates.
- Make sure you have the latest version of WordPress and that your plugins and themes are all up to date.
- Check that the following plugins are not installed in your WordPress account:
- Caching plugin (you can use the cache manager in our control panel);
- Backup plugins of any kind (you can use the backup restore procedure in our control panel)
- server-based plugins to optimize your images
- server-based plugins to compress your videos
- Plugins to improve performance
- Here you will find a list of other prohibited plugins:
- Allow PHP Execute;
- Dynamic Widgets;
- Exec-PHP;
- Inactive User Deleter;
- Pipdig Power Pack (P3);
- WP-RSS Multi Importer;
- WordPress Popular Posts;
- Facebook Instant Articles & Google AMP Pages;
- Facebook Open Graph, Google and Twitter Card Tags;
- Antispam by Clean-talk;
- Easy Updates Manager;
- Broken Link Checker;
- MyReviewPlugin;
- LinkMan;
- Fuzzy SEO Booster;
- WP PostViews;
- Tweet Blender;
- Jetpack Related Posts;
- Related Posts for WordPress;
- Outbrain; Contextly;
- WPML
If you need help, you can contact our technical support. Our technicians will be happy to help you!
Managed WordPress: How to create a test environment
Our Managed WordPress hosting includes a test environment where you can test changes to your website and be sure that you don’t accidentally damage the live version of your website.
To create a test environment, proceed as follows:
Visit your personal customer area.
If you don’t remember how to do this, follow these instructions.

Then click on the WordPress hosting product that you have purchased and for which you want to create a test environment.

Find the domain you want to manage and click on the blue link to open the dashboard for that domain.

Click on the green Create new test environment button on the right-hand side of the overview page.
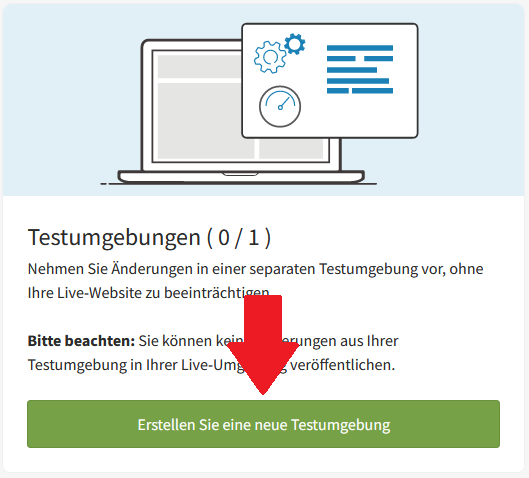
You will now be asked to create a name for your test environment.
We recommend that you choose a short name, which will make it easier for you to access the corresponding workspace in the future.

Now enter the subdomain, i.e. the web address that you will use to access your test environment in future.

Click on the Create button. An identical copy of your website will be created, which you can work on immediately without affecting the live version.
Creating and configuring the test environment can take up to 15 minutes.
Once you have created your test environment, you can start working on it!
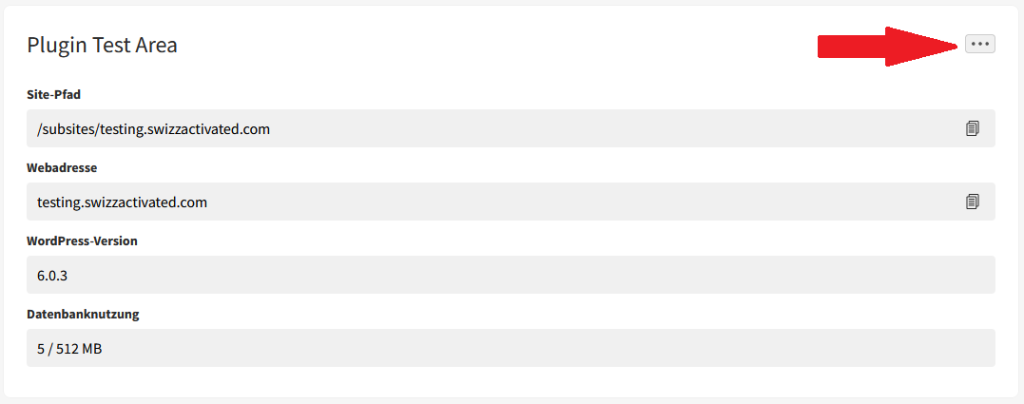
To manage your test environment, click on the menu in the top right-hand corner (three dots) on the Test environment page.
From this menu, you can access the workspace, restore a copy of the website or delete the test environment.
Each WordPress hosting package offers a variable number of configurable test environments and has its own database.

The test environment is not a staging site, but a copy that you can send to production to replace the online environment.
Once you are happy with the changes, you need to implement them on the website.
Managed WordPress: How to use backups
hr Managed WordPress hosting stores backups for 30 days, so you can be sure that you’ll always have a working version of your website to restore.
If you need to restore the content of your website, please follow the instructions below.
Visit your personal customer area.
If you no longer know how to do this, follow these instructions.

Click on the desired WordPress hosting product to access the WordPress Hosting Management Dashboard.
All your managed (Managed) and unmanaged WordPress hosting products are located in the Control Panel below the WordPress Hosting menu item.

As soon as you click on one of the WordPress products, the hosting dashboard opens. There you can see the respective product that is assigned to the domain. There may be several domains in this dashboard. Click on the relevant domain.

Within the hosting dashboard, you will see a general overview and basic information about your WordPress hosting.
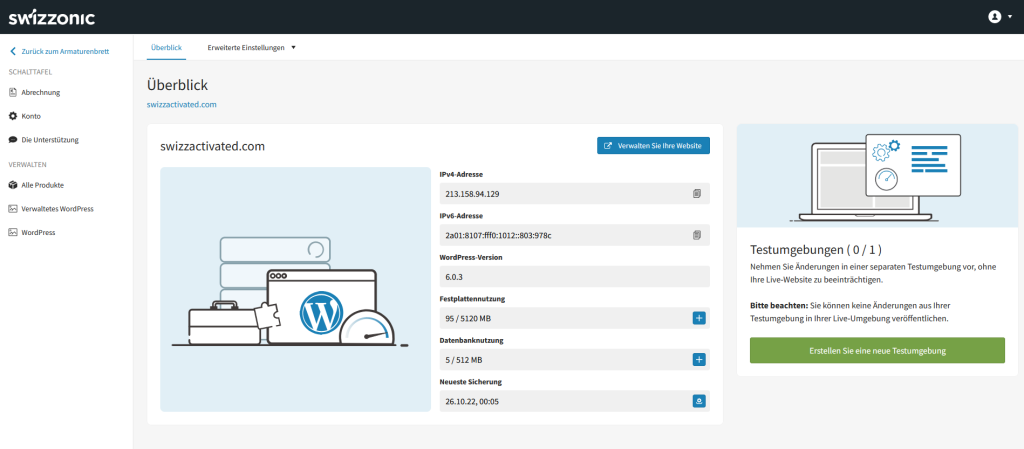
Above the hosting information, you will find the Advanced settings menu button. Click on the button and select Backups.
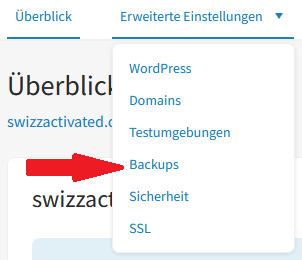
After you have clicked on Backups, you will see all the backups that the system has performed up to this point.
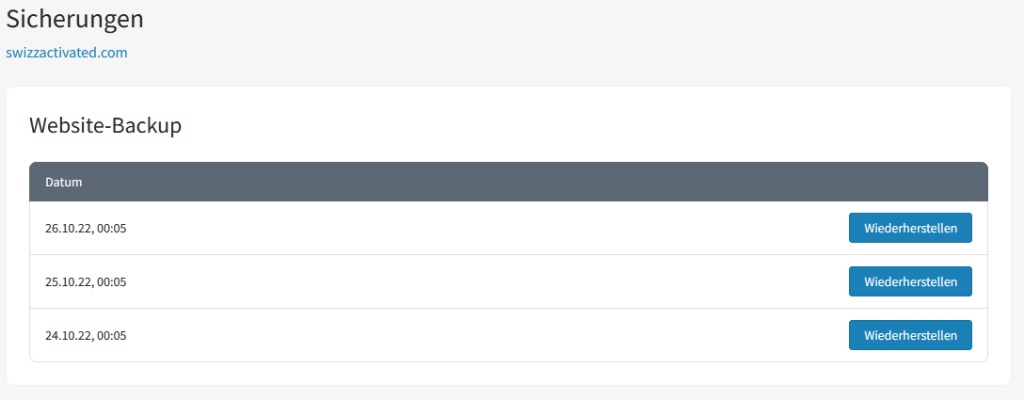
The system creates hourly backups, which are saved for 12 and 24 hours depending on the selected plan. Hourly backups are converted into daily backups after 24 hours.
Once you have determined the date on which you want to restore your content, click on the corresponding Restore button.
You will be asked to confirm the start of the restore process.

After confirmation, the restore process will start. The process can take up to 30 minutes (depending on the size and structure of your website).
Plugins that are not supported by Managed WordPress
To ensure the performance, reliability and security of the Managed WordPress hosting package, certain plugins are not allowed. These plugins are not necessarily “bad”, but they are not fully compatible with the functionality that Swizzonic offers with Managed WordPress.
WordPress hosting already has tools for managing backups and caches. External plugins that perform the same functions would then trigger conflicts.
Unsupported plugins for Managed WordPress
Caching plugin
For Managed WordPress, we strongly advise against installing caching plugins, as this function is already handled by Varnish at server level.
Varnish works much better than any other plugin to improve the performance of your website.
The following plugins are therefore not allowed:
- Cache Enabler
- Cache Litepeed
- WP Fastest Cache
Back-up plugin
Managed WordPress creates a daily backup that you can access from your control panel.
From the same panel, you can restore backups of your website or test environment with a single click.
These plugins consume bandwidth and disk space and thus affect the performance of your website.
Plugins that create non-incremental backups are not allowed. The most important ones are:
- All-in-One WP Migration
- BackupBuddy
- BackWPup
- Snapshot
- Updraftplus
- WP DB Backup
- WP DB Backup Made
Still want to create external backups?
Make sure you’re using an incremental backup plugin, such as
- VaultPress
- WP Time Capsule
- ManageWP
- BlogVault
Plugins to optimize your images
To ensure the performance of the Managed WordPress hosting package, no server-based plugins are allowed to optimize your images. However, you can use plugins on external servers for image optimization.
Some good examples of useful plugins for this purpose are
- Imagify Image Optimizer
- ShortPixel Image Optimizer
- Optimole, EWWW Image Optimizer Cloud
- Optimus Image Optimizer
- WP Smush
- TinyPNG and ImageRecycle
Plugin for compressing your videos
As with images, no server-based plugins are permitted for video conversion and compression.
This includes FFMPEG.
Plugins to improve performance
These plugins are not fully compatible with Managed WordPress as we have already optimized our WordPress.
Consequently, they have no (or a negative) impact on performance:
- Better WordPress Minify
- P3 Profiler
- Optimize Database after Deleting Revisions
- WordPress GZIP Compression
- WP-Optimize
- JCH Optimize
Other unsupported plugins
- Allow PHP Execute
- Dynamic Widgets
- Exec-PHP
- Inactive User Deleter
- Pipdig Power Pack (P3)
- WP-RSS Multi Importer
- WordPress Popular Posts
- Facebook Instant Articles & Google AMP Pages
- Facebook Open Graph, Google and Twitter Card Tags
- Antispam by Clean-talk
Plugins for Managed WordPress are strongly discouraged
These plugins can overload the server or lead to a large number of database queries.
In both cases, the performance of your website will be significantly impaired.
Here are the plugins we advise you not to use:
- Broken Link Checker
- MyReviewPlugin
- LinkMan
- Fuzzy SEO Booster
- WP PostViews
- Tweet Blender
- Jetpack Related Posts
- Related Posts for WordPress
- Outbrain
- Contextly
We work every day to provide you with an efficient service and maintain a high level of performance.
By following the advice of our technical experts, you will always have a website that is in top shape, and problems with incompatibility or inconsistencies between components can be avoided.
Just in case, our support service has a team of WordPress experts who have expertly configured hosting for the world’s most popular CMS.
Useful information
You can view your subscriptions in the administration panel under All products. Click on the desired domain name to open the dashboard.

Here you can manage your hosting.
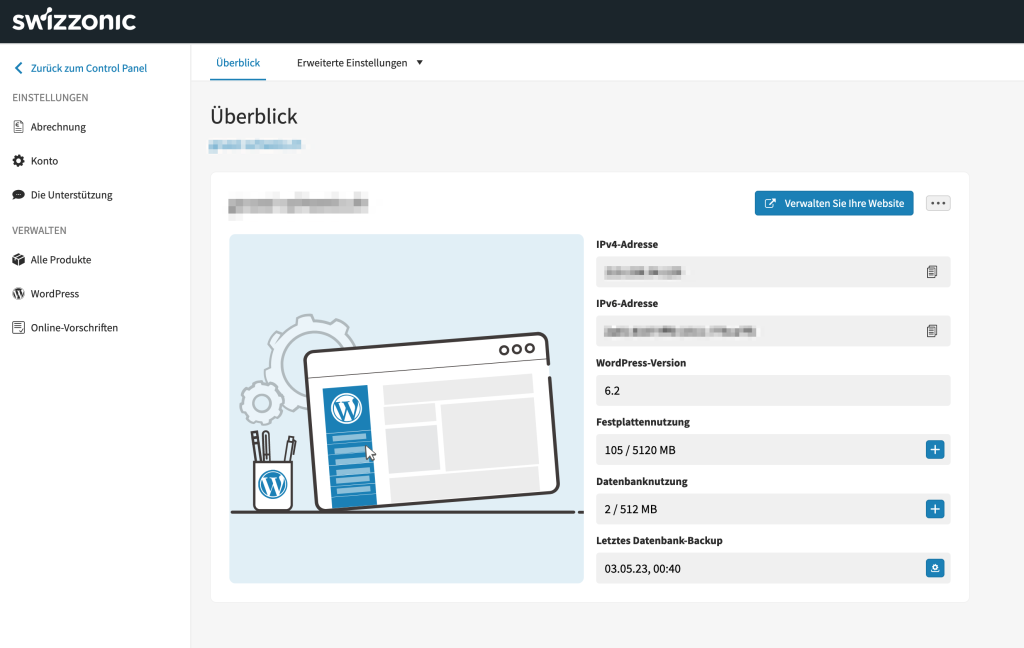
Before you click on Manage your website, please check that the A record in the DNS zone resolves to the correct IPv4 address. If this is not the case, change the entry with the correct IP address from the hosting dashboard. Once the entry has been entered correctly in the DNS zone, you can access the WordPress administration panel via the blue button.
